RESOURCES

Last Updated
Most AI agency founders spend weeks, sometimes months, thinking about their website before they build anything. They wait until the brand feels right, the copy is perfect, and every section reflects exactly who they want to be. Meanwhile, potential clients are landing on an empty page, a half-finished Notion doc, or a generic one-pager that does not build trust.
The uncomfortable truth: a professional AI agency website that is live today beats a perfect one that launches in three months. Deals close on live sites. They do not close on “coming soon” pages.
This guide walks you through launching a credible, conversion-focused AI agency website in a single day using Framer. Not a rough draft — a genuinely professional site you would be comfortable sending to a serious client.

What You Need Before You Open Framer
Do not open Framer until you have these three things ready. Getting them wrong is the single biggest reason people spend days on what should take hours.
1. Your One-Sentence Offer
Not a paragraph. Not a mission statement. One sentence that states what you do, who you do it for, and what outcome they get. This becomes your hero headline and the anchor for everything else on the site.
Bad examples:
“We are an AI-first agency leveraging cutting-edge technologies to transform your business.”
“We help companies harness the power of artificial intelligence.”
Good examples:
“We build custom AI agents that replace your manual workflows — deployed in under four weeks.”
“We help e-commerce brands automate customer support with AI, cutting response time by 80%.”
“We turn your internal data into working AI systems your team can actually use.”
The formula: We help [specific client type] achieve [specific outcome] by [specific mechanism].
If you cannot write this sentence before building your site, your site will be vague regardless of how good the template looks.
2. Three to Five Client Results or Projects
These go in your case studies or portfolio section. They do not need to be formal case studies. A project name, a one-line description of what you built, and one measurable outcome is enough to start.
If you are pre-client, use internal projects, personal builds, or tools you have built for yourself. Something is always better than the “Lorem ipsum” placeholder text that ships with every template.
3. A Professional Email Address
Not your personal Gmail. An email at your domain — hello@youragency.com or team@youragency.com. This appears on your contact form and footer. A Gmail address on an otherwise premium site undermines all the credibility you are trying to build.
Step 1 — Choose the Right Template for Your Agency Type
The template you choose determines how long customisation takes. The wrong template means you spend most of the day fighting the layout instead of replacing content.
For AI Automation and Workflow Agencies
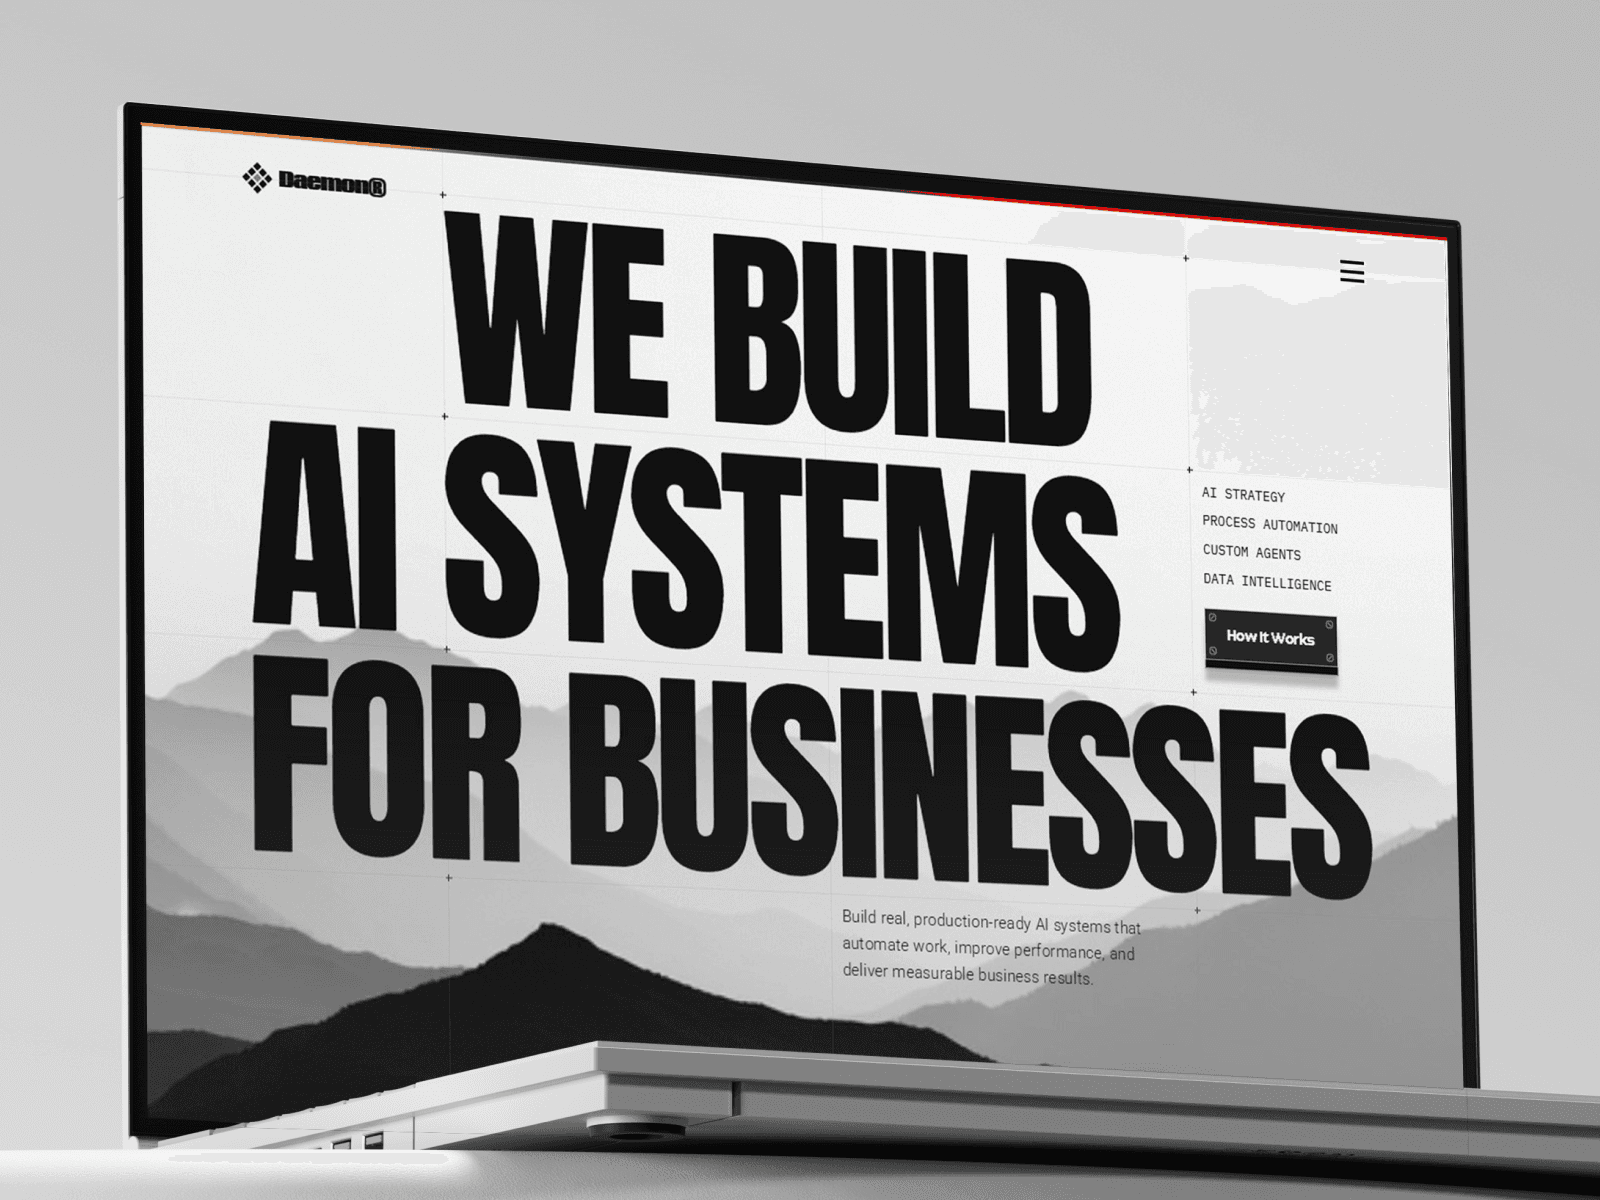
Use Daemon. The layout is built around service-first architecture with strong process sections and CMS-powered case studies. If your work involves making client workflows faster, smarter, or automated, Daemon’s content structure maps directly onto how you would explain that.
For Technical and Research-Focused Agencies
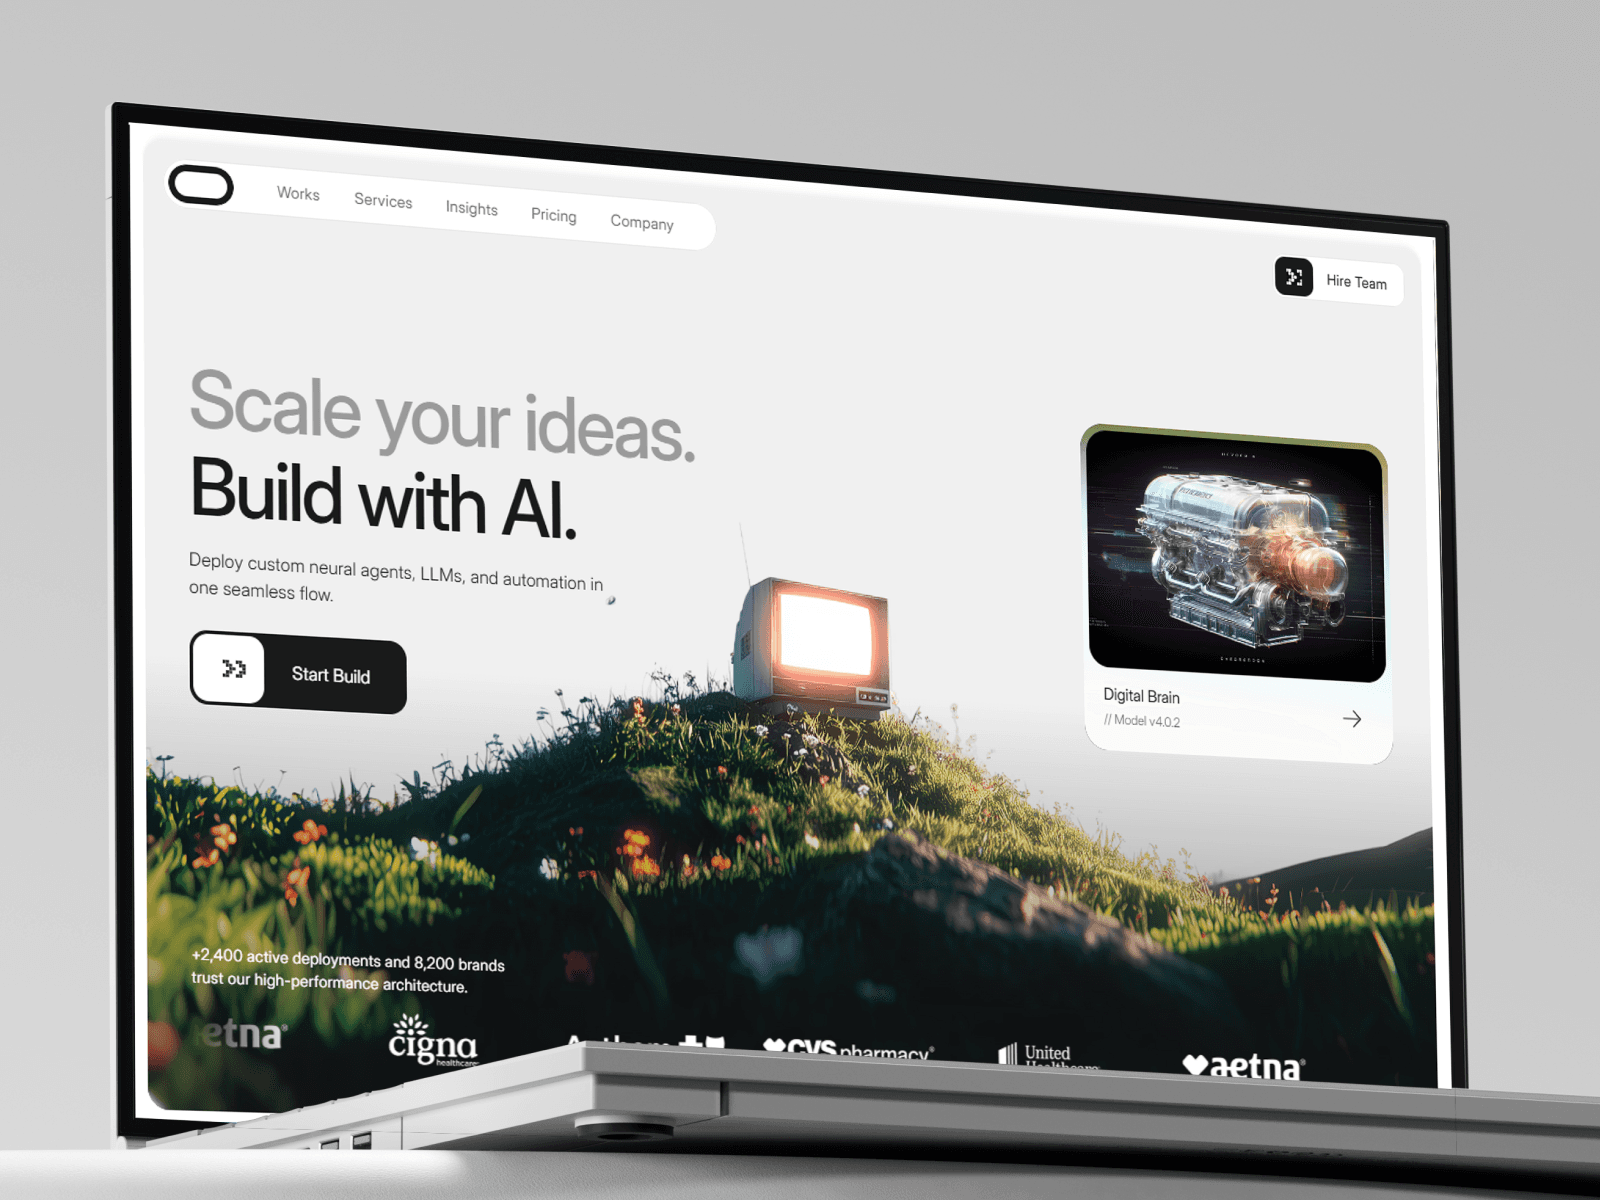
Use Spartan. Engineered for agencies working with enterprise clients, LLM infrastructure, or custom AI model development. The technical aesthetic and data-dense layout projects the kind of authority that converts serious technical buyers.

For Broad AI Consultancies
Use Armory. The most complete multi-page template on the Framer marketplace for AI agencies. Covers every section you need across nine-plus pages with a clean, enterprise-ready aesthetic that works across multiple service types.
For a full comparison of all three, see Best Framer Templates for AI Agencies in 2026.
Step 2 — Customise the Core Sections First
Do not try to perfect every section at once. Go in this exact order and you will be live by the end of the day.
Priority 1: Hero Section (30 minutes)
This is the highest-leverage section on your site. Every visitor sees it first. Here is what to change:
Headline: Replace with your one-sentence offer from Step 1
Subheadline: One sentence explaining who you serve and what outcome you deliver
CTA button text: “Book a Call,” “Get a Free Audit,” or “See Our Work” — not “Learn More” or “Get Started”
Background image or video: Replace with something relevant to your brand. If the template ships with a placeholder, a high-quality abstract tech image from Unsplash works until you have brand assets
Do not move on until the hero clearly communicates what you do.
Priority 2: Services Section (45 minutes)
List exactly what you offer. Three to five services maximum. Each service needs:
A clear name (not jargon)
One to two lines explaining what it is and who it is for
Optional: an icon or small visual
Example:
AI Workflow Automation — We map your manual processes and rebuild them with custom AI agents, reducing execution time by 60 to 90%.
LLM Integration — We connect large language models to your existing tools, databases, and customer-facing products.
AI Strategy & Consulting — For teams that need a roadmap before they build. We scope your AI opportunity, prioritise use cases, and deliver a deployment plan.
Priority 3: Case Studies (60 minutes)
Add two to three projects using whatever you have. Even simple entries dramatically outperform empty placeholders.
Minimum viable case study format:
Project name and client type (you do not need to name the client)
What you built in two to three sentences
One measurable outcome: time saved, revenue generated, error rate reduced, response time cut
Priority 4: Pricing or CTA Section (20 minutes)
Either list your starting price, or remove this section and replace it with a direct call-to-action. Do not leave the placeholder pricing from the template. A site that says “$XX” for pricing looks unfinished and unprofessional.
If you are not ready to list prices, a “Book a Discovery Call” CTA with a Cal.com or Calendly link is cleaner than fake placeholder pricing.
Priority 5: Contact Form (15 minutes)
Connect it to your email. Test it. Seriously — submit the form yourself and confirm you receive the email. A broken contact form is a silent deal-killer.
Step 3 — Set Up SEO Before You Publish
This takes twenty minutes and most people skip it entirely. Do not skip it.
Page Title
Format: [Agency Name] — [What You Do] | [City or Niche]
Examples:
“Delani — AI Agency Website Design for SaaS Startups”
“Flux AI — Custom Automation Agents for E-commerce Brands”
“Vertex Systems — LLM Consulting for Enterprise Teams”
In Framer: Site Settings → General → Site Name. Individual pages get their own title under Page Settings → SEO.
Meta Description
One sentence, under 160 characters. Write it like a Google ad — what you do, who it is for, why someone should click.
Example: “We build custom AI agents and automation workflows for e-commerce brands. Launch in under four weeks. Book a free discovery call.”
Connect Your Domain
If you own a domain, connect it before publishing. Go to Site Settings → Domains and follow the CNAME setup for your registrar. A .framer.website URL on a proposal looks unfinished.
Submit to Google Search Console
After publishing, go to search.google.com/search-console, add your property, and use URL Inspection to request indexing on your homepage. This tells Google to crawl your site immediately rather than waiting weeks for organic discovery.
Step 4 — Publish and Share Immediately
Once core sections are done and SEO is set, publish. You can iterate after launch. The site being live is worth more than it being perfect.
Immediately after publishing:
Share the URL with past clients and collaborators. Referral traffic does not require you to rank on Google. It just requires a URL.
Post on X and LinkedIn. Even a simple “just launched my agency site, would love feedback” post generates early traffic that helps Google assess your site’s relevance.
Submit all your pages to Search Console. Use URL Inspection on your homepage, services page, and any blog posts you have published.
What to Improve in Week Two
Once you are live, come back and layer in:
Week 2 Priority | Why It Matters |
|---|---|
Add a blog section | Content drives long-term organic traffic |
Expand case studies | More detail = more credibility = more conversions |
Add testimonials | Social proof is the highest-converting element on any agency site |
Set up Google Analytics | You cannot improve what you cannot measure |
Test on multiple devices | Check iPhone, Android, and tablet specifically |
Common Mistakes That Add Hours to This Process
Trying to write perfect copy before building. Write placeholder copy that communicates the right ideas, build the site, then refine. Writing in isolation without seeing the page layout is slower than writing directly in Framer.
Choosing a template based only on aesthetics. Pick the template built for your agency type first, then worry about how it looks. A template with the wrong structure will require you to redesign sections rather than just replace content.
Perfecting sections nobody will see first. Most visitors see your hero, your services section, and your contact form — in that order. Spend 80% of your time on those three sections and 20% on everything else.
Launching without testing the contact form. Submit the form yourself. Receive the confirmation. Confirm the email lands in your inbox, not your spam folder.
Waiting for a logo before launching. A typographic logo (your agency name in a clean font) is better than a delay. You can update it later.
The Timeline: What a Real One-Day Launch Looks Like
Time | Task |
|---|---|
9:00 AM | Purchase template, duplicate to your Framer workspace |
9:30 AM | Customise hero section — headline, subheadline, CTA |
10:30 AM | Services section — list three to five services with one-line descriptions |
12:00 PM | Lunch break |
1:00 PM | Case studies — add two to three projects with basic content |
2:30 PM | Pricing or CTA section — real number or direct CTA |
3:00 PM | Connect domain, set up SEO fields on all pages |
3:30 PM | Test contact form, check mobile layout |
4:00 PM | Publish |
4:30 PM | Submit to Google Search Console, share URL |
Once your one-day site is live, the words on it matter as much as the layout — see AI Agency Website Copywriting: How to Write Words That Close Deals for the hero, service, and CTA formulas that turn that fast launch into real leads.
Related Reading
Framer Template vs. Custom Build — Which Is Right for Your AI Agency?
AI Agency Landing Page: A Conversion-Focused Structure That Works
AI Agency Website Copywriting: How to Write Words That Close Deals
FAQ
Can I really launch a professional AI agency website in one day? Yes, if you have your offer, basic project examples, and brand assets ready before you open Framer. The customisation itself takes a few hours. The preparation is where most people lose time.
Do I need to know how to code? No. Framer templates are fully no-code. Everything from text and images to animations and layout is managed visually in the editor.
What Framer plan do I need? The Basic plan at approximately $10 per month gives you a custom domain, which is the minimum you need for a professional launch. The free plan shows a .framer.website URL in the address bar, which undermines credibility on client proposals.
What if I do not have case studies yet? Use internal projects, tools you have built, or any relevant work — even if it was done before you formally launched the agency. Describe what you built and what it accomplished. Something always beats nothing.
Should I build my own website or hire someone? For most early-stage AI agencies, a template is the right move. It is faster, cheaper, and gives you a professional result you can manage yourself. For established agencies targeting enterprise clients at $50,000-plus engagements, a custom build may be worth the investment. See the full breakdown in Framer Template vs. Custom Build.



Resources